An AI video editor can mean two different things: software that helps edit existing footage, or a generator that creates new footage from a prompt. Dika’s public documentation describes both workflows, but as separate tools. The video editor is a browser-based, multi-track timeline for arranging and finishing clips. AI Studio generates short clips through connected video providers. Knowing which job each tool does makes it easier to choose a workflow and set realistic expectations.
In the documented editor, you can trim and split video, arrange audio and subtitle tracks, add effects, record footage, generate captions, and render an MP4 in your browser. Selected AI-assisted editing tools run on your device. For generated footage, AI Studio sends a prompt and optional reference frames through a provider you connect. Those are complementary capabilities, not one button that automatically turns a brief into a finished campaign.
This distinction also matters when reading about Dika’s browser-based creative workspace. The public docs describe the current Dika app. The separate Dika Studio product page identifies Studio as pre-launch, with invitations and feature availability varying during rollout. This guide labels those product states rather than treating every Studio capability as generally available today.
Availability note: The editing and AI-generation steps below reflect features documented at docs.dika.design. Dika Studio is a separate pre-launch experience. Access, providers, and enabled surfaces can depend on rollout.
What “AI video editor” means in practice
The phrase “AI video editor” covers a broad category. Some products focus on generating clips from text. Others help with specific editing tasks, such as removing a background, cleaning up noisy audio, tracking a face, or creating subtitles. A timeline editor still matters because generated footage and camera footage usually need decisions about sequence, timing, sound, captions, and export.
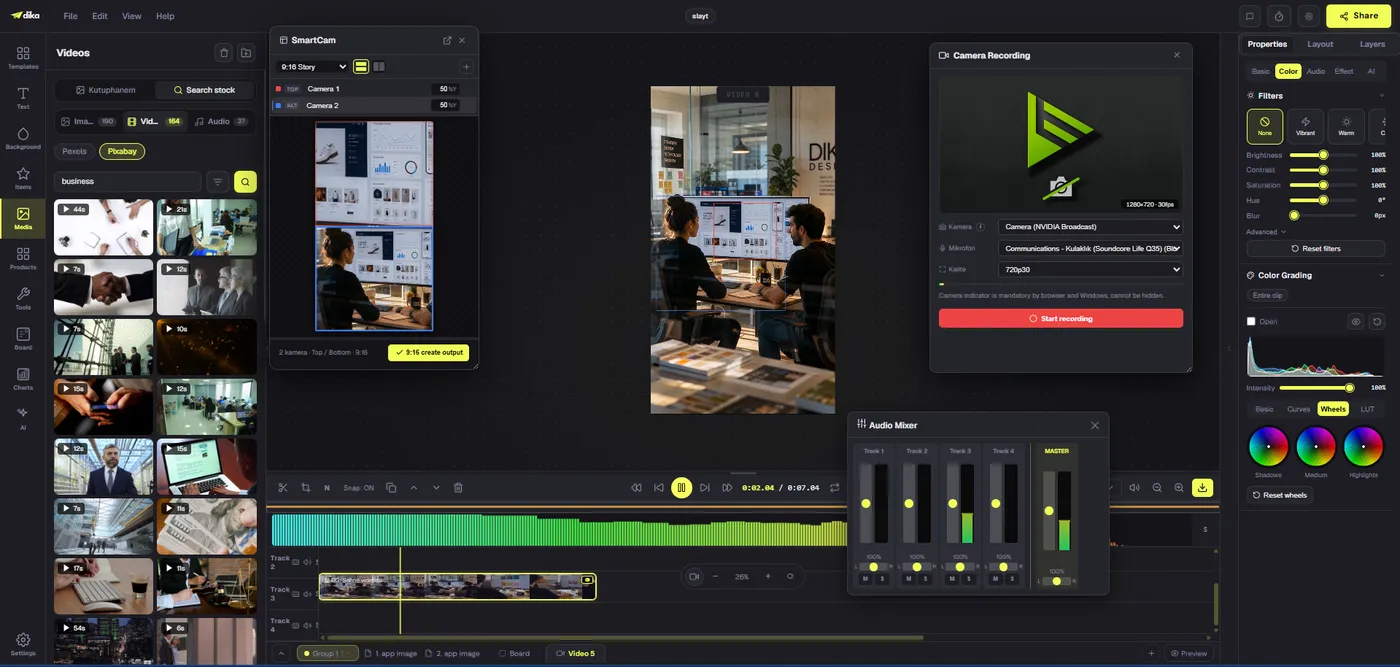
Dika’s documented video editor is built around that timeline work. It runs in the browser and treats a video as one part of a larger project. Video, audio, and subtitle clips sit on separate tracks. The preview combines overlapping clips, while the inspector holds settings for the selected clip. Text, images, and shapes added on the preview can become timed overlay clips, so titles and graphic elements can be positioned and trimmed alongside footage.
AI supports particular steps inside that editing process. Background removal, denoise, face tracking, and automatic subtitles are described as on-device features using models loaded into the browser. They assist with footage already being edited; they are not the same as asking a remote video model to invent a new scene. For exact features and workflows, see the video editor overview.
Editing, generation, and pre-launch Studio: three different jobs
These terms often appear together in product descriptions, but they describe different stages. The comparison below reflects the public documentation and Studio page, not a promise that every pre-launch feature is enabled for every account.
| Surface | Main job | What public documentation says |
|---|---|---|
| Video editor | Edit and finish footage | Multi-track timeline, effects, audio, subtitles, on-device AI assists, and MP4 export in the documented Dika app. |
| AI Studio video mode | Generate a short clip | Prompt-based generation with optional start or end frames, using supported connected providers. |
| Marketing Studio | Prepare ad-style generations | Modes, recipes, saved product and avatar references, optional script drafting, then handoff to video generation. |
| Dika Studio | Connect creative work in a broader production system | Public product page describes a pre-launch product. Access and surface availability depend on rollout. |
Within Dika’s creative production workflow, the editor and generator can be used together, but their controls and costs differ. Editing footage in the timeline does not require using a video-generation model. Generating a clip does require an eligible provider and may incur that provider’s charge. The video-generation guide explains provider and frame support; the plans and limits guide explains the documented app’s AI billing model.
What you can do in Dika’s documented video editor
Arrange clips across tracks
Start with video, audio, and subtitle tracks. Drag media onto the timeline or use the media browser to bring in files already imported into the project. Trim a clip by dragging an edge; split it at the playhead; move it between tracks; and use snapping to line clip edges up. A playhead lets you scrub through the edit, while markers can flag moments to revisit.
Three edit modes help control what happens after a trim or delete. Normal mode can leave a gap. Ripple mode shifts later clips to close the gap. Insert mode pushes later clips out of the way when new material is added. Those choices matter in practice: a rough cut often benefits from ripple editing, while normal mode can be useful when timing and gaps are intentional. The timeline and tracks guide covers the modes and controls.
Build a layered composition
Separate tracks make it easier to manage a main shot, a voiceover, music, and captions independently. You can mute or solo audio tracks, adjust their levels, and move clips without flattening the whole composition into one file. On the preview canvas, text, images, and shapes can become overlay clips on the timeline. That gives titles and graphic elements their own timing rather than baking them into the video at the start.
This structure is useful for common deliverables: a talking-head video with a lower third, a product clip with a separate music bed, or a short social edit with timed captions. Keep related elements separate while the edit is changing. Once timing is stable, transitions and color treatment are easier to apply consistently.
Refine color, transitions, and effects
Choose a clip and work from the inspector to adjust its transform, filters, speed, transitions, or color grading. The documented effects include transitions, grading presets and levels, LUTs, chroma key, style filters, and blend modes. AI background removal can help isolate a subject without a green screen. These tools modify or style selected clips; they do not replace the editorial decisions about which shots belong in the sequence.
For a cleaner first pass, finish the rough cut before spending time on effects. Establish the order and duration of clips, then choose transitions and a consistent color direction. This keeps a visual treatment from hiding pacing problems. Dika’s effects, transitions, and color guide lists the documented controls.
Mix sound and create subtitles
The audio mixer provides controls for individual tracks and the master output. You can adjust volume, pan, mute, and solo; audio clips also have volume and equalization controls. Presets can reshape a clip’s sound, and AI denoise can reduce background noise. If you need new material, the editor can record screen, camera, or microphone footage directly onto a track.
Automatic subtitles turn speech into timed cues on a subtitle track. You can edit those cues like other timeline content or import an existing subtitle file. Keeping captions on their own track lets you adjust timing, revise wording, or omit them from a particular export without changing the underlying video. See audio, recording, and subtitles for details.
Use on-device AI assists
The documented video editor’s AI-assisted background removal, denoise, face tracking, and auto-subtitle tools run on-device using models loaded into the browser. This can make them useful during editing without sending footage away for the preview or render. The first time you use one of these features in a session, the browser needs to fetch its model; after loading, it is cached for the rest of that session.
These are focused assists, not an autonomous editor that chooses a narrative, selects the best takes, or approves the final cut for you. You remain responsible for the sequence and the result. Face tracking can create position and scale keyframes to help keep a subject framed. Automatic subtitles create a starting point that should still be checked for names, technical terms, punctuation, and timing.
Export a finished video
Export applies to the video part you are editing, not to every page, scene, and slide in the wider project. In the documented app, MP4 (H.264) is the format that renders end to end today. The export dialog’s other options are not yet fully wired up, so use MP4 when you need a finished file. Resolution, aspect ratio, frame rate, quality, audio inclusion, and an optional timeline range are available in the export workflow.
Rendering happens in the browser and depends on browser support for the required encoding APIs. If the browser cannot provide an encoder, the editor reports that rather than silently producing a broken export. The project model also matters: a video is one part alongside pages, scenes, and slide decks. There is no single rendered export that can represent every different part type at once.
A practical workflow: from footage to a finished clip
A dependable edit in Dika’s creative workspace starts with a clear goal. Decide where the video will be watched and what the viewer should understand or do. A vertical product demonstration, a landscape interview, and a square announcement may use the same source material, but they need different framing and pacing. Choose the target format before polishing details.
- Create or open a video part.
Open a video part in the project or add one from the page tabs. The editor docks the timeline at the bottom and uses the center canvas as the preview. Dika’s project model keeps a video alongside other creative parts instead of treating the entire project as one video file. Learn more in Projects and parts.
- Import footage or record a take.
Drag video, audio, or image files onto the timeline, or use the media browser to find imported assets. You can also record screen, camera, or microphone footage directly to a track. Give the main footage, narration, and music their own tracks if you expect to adjust them separately.
- Make a rough cut.
Trim starts and ends, split around unwanted moments, and put clips in the intended order. Use ripple mode when removing a section should close the gap. Add markers for decisions you want to revisit. Keep the first pass focused on sequence and pacing rather than transitions.
- Set the visual treatment.
Adjust framing and color, then add transitions where they support the story. Use chroma key or AI background removal only when the shot calls for it. If text or a logo must remain visible, place it as a timed overlay and review its timing against the footage.
- Finish sound and captions.
Balance dialogue, narration, and music across tracks. Apply denoise if background noise distracts from the speaker. Generate subtitles, then review the transcript and cue timing. Captions are part of the viewer experience, so correct transcription errors before export rather than relying on the first automated pass.
- Export and review.
Choose MP4 (H.264), set dimensions and frame rate for the destination, and decide whether to include audio. Watch the exported file from beginning to end. Check for clipped words, unexpected gaps, unreadable captions, and transitions that feel too fast or slow.
This process works for original footage and generated clips. The difference is where the source material comes from. If the footage already exists, begin in the timeline. If you need a new generated shot, use AI Studio or Marketing Studio with an eligible provider, then bring the resulting clip into the project timeline. Dika’s marketing-video tutorial documents this combined path: generate a first draft, then trim, caption, and export it in the editor.
When to generate footage instead of editing it
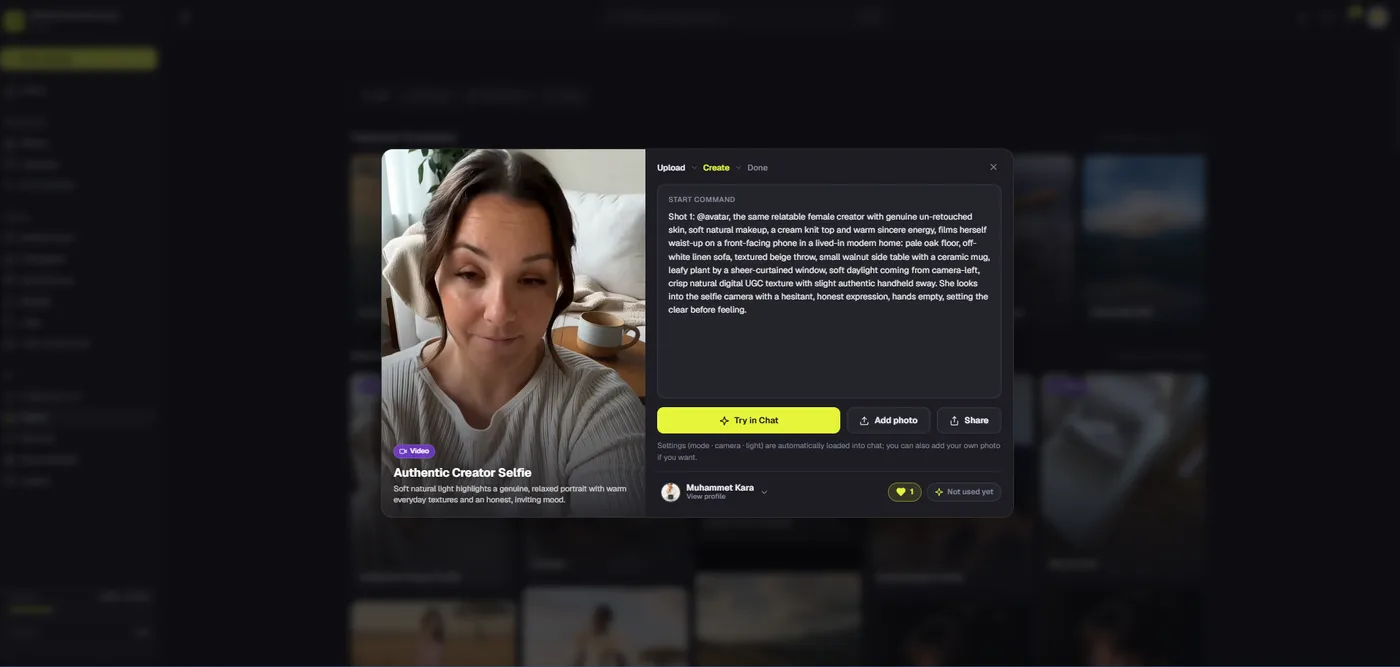
Prompt-based generation is useful when you need a visual starting point, a short product shot, or a scene that would be difficult to capture with a camera. In AI Studio’s Video mode, write a prompt, choose aspect ratio, resolution, and duration, and optionally provide a start frame. Qwen supports both start and end frames in the documented workflow; fal.ai and BytePlus use a start frame. Support depends on the selected provider and model.
The composer offers duration choices of five or ten seconds, while individual models may accept or clamp duration differently. That makes generated footage a source for an edit, not a promise of a finished long-form video. A short clip can become one shot in a larger timeline. You can then place it beside recorded footage, add titles or voiceover, and control its timing in the editor.
Generation also has a different cost model from timeline editing. In the documented app, you connect your own provider key, and the provider bills for its model and duration. The composer shows a cost preview for some providers; other providers may require checking their pricing separately. Rates and model availability can change, so check the estimate and provider terms before generating. For a guided advertising workflow, Marketing Studio adds modes, recipes, and saved avatar or product references before handing the prompt to video generation.
What local processing does—and does not—mean
Privacy claims need to match the operation. The video editor documentation says the listed AI-assisted editing steps and final preview/rendering run on the device, and that footage is not uploaded for preview or rendering. The browser downloads the required models the first time you use them in a session. That statement is about the documented editing and rendering path.
AI video generation is a separate provider-backed operation. It uses a connected video provider and can use a prompt plus selected reference frames. Do not extend the editor’s local-render statement into a blanket claim that every AI operation stays on-device. Before generating, review the selected provider’s terms and understand which prompt or reference material you are submitting. The documented AI Studio keeps provider keys encrypted server-side and does not return them to the browser; key handling and provider data handling are different questions.
For teams publishing a product workflow, this distinction is more than a technical footnote. A useful privacy explanation says which steps process local footage, which steps call an external model, and what settings or provider policies apply. Avoid phrases such as “all AI is private” unless product documentation supports that exact scope.
Current Dika app and Dika Studio pre-launch are not interchangeable
The public docs describe a browser-based Dika app with a video editor, AI Studio, and Marketing Studio. The Dika Studio product page describes a broader production workspace and explicitly says the product is pre-launch. It invites teams from a waitlist in small groups and says that surface availability can vary during rollout. The page also discusses team collaboration, managed generation where enabled, scene-based workflows, and connected delivery. Those statements should be presented as Studio’s pre-launch scope, not as universal availability in the documented app.
The docs make several boundaries explicit. The current documented app uses your own AI provider key; managed AI credits are described as planned rather than live. The roadmap also identifies team and organization management and a full English app interface as planned. The English-language documentation and blog do not, by themselves, mean the current app interface is in English.
For readers, the practical instruction is simple: describe the feature and product version you mean. Say “the Dika video editor documented today” for the timeline workflow. Say “Dika Studio’s pre-launch product page describes…” for broader team and scene workflows. If access or provider options are important to the article, direct readers to the current roadmap and the Dika Studio page instead of promising an account will have a specific capability.
Who benefits from an AI-assisted video editor?
A timeline editor with focused AI assists can help creators who already have footage but want a smoother route to a clean, publishable cut. A solo marketer can record a demonstration, trim pauses, generate a first subtitle track, reduce room noise, and export an MP4. A small creative team can keep music, voiceover, captions, and footage on separate tracks for easier revisions. A product designer can combine an AI-generated shot with existing graphics and recorded material, then decide exactly when each element appears.
The approach is especially useful when control matters more than one-click automation. You can inspect a cut, adjust an overlay, move a caption, or balance a track rather than accepting a flattened result. AI can speed up discrete tasks, but it does not replace reviewing the content for accuracy, brand fit, rights, and accessibility. The person editing still makes the final decisions.
It may be less suitable when the only requirement is instant, fully automated production of a long video from a single sentence. Dika’s documented generator focuses on short provider-generated clips, while the editor expects you to assemble and refine timeline content. That division can be an advantage: generate only the shot you need, then control the finished sequence yourself.
Choose the right starting point
Use the timeline when you have footage to cut, sound to balance, captions to correct, or a specific export to deliver. Use AI Studio video mode when you need a new short clip from a prompt or reference frame and are ready to use a connected provider. Use Marketing Studio when an ad-style recipe, product reference, avatar, or generated script would help shape that prompt.
These tools form a practical production path: prepare a concept, generate a shot if needed, edit the sequence, check sound and captions, then export an MP4. They are separate steps with separate limits, not a claim that every video is generated and finished automatically. For broader product context, explore Dika Design’s visual workspace and its project-based creative tools. Check the documentation for current editing details, and check the Studio page for pre-launch access and rollout information.
When evaluating any AI video editor, ask three questions: what can it generate, what can you edit manually, and where does each step run? In Dika’s documented workflow, the answers are distinct. AI Studio generates provider-backed clips; the video editor gives you a multi-track browser timeline with specific on-device AI assists; Dika Studio is a broader pre-launch product whose availability varies. That clarity helps you choose the right tool and plan a workflow that ends with a file you can actually deliver.
Frequently asked questions
1. Is Dika’s AI video editor available now?
The public Dika docs describe a current browser-based video editor. The separate Dika Studio product page says Studio is pre-launch, with invitations and feature availability varying by rollout.
2. What is the difference between an AI video editor and an AI video generator?
A generator creates footage from a prompt or reference frames. An editor arranges and refines footage on a timeline with cuts, audio, captions, effects, and export controls. Dika documents these as separate but complementary tools.
3. Can Dika generate a video from text?
AI Studio Video mode can generate short clips from prompts using supported providers. Start-frame and end-frame support depends on provider and model.
4. Do I need my own AI provider key?
The documented Dika app uses your own provider key, and your provider bills for generation. Dika Studio’s pre-launch page says managed generation may be available where enabled, so availability can vary.
5. Does video editing upload my footage?
The docs say preview, rendering, and listed on-device AI editing steps do not upload footage. Provider-backed video generation is a separate operation; do not assume the local-render statement covers it.
6. Which AI editing tools are documented?
The video editor docs list AI background removal, denoise, face tracking, and automatic subtitles. These assist specific editing tasks; they do not automatically make all editorial decisions.
7. What video export format works today?
MP4 (H.264) is the format documented as rendering end to end today. Other formats shown in some references are not fully supported yet.
8. Can I edit an AI-generated clip on the timeline?
Yes. Dika’s marketing-video tutorial describes bringing a generated clip into the project timeline to trim, caption, and export it.
9. Does Marketing Studio build a complete multi-scene storyboard?
Public docs describe modes and recipes that shape a prompt, optionally draft a script, and hand off to video generation. They do not establish a standalone scene-by-scene storyboard editor.
10. Is Dika Studio’s team collaboration available to every user?
No universal availability is promised. The Studio page says pre-launch access is rolling out in groups and surface availability may vary. Check the current product page for access details.